When it comes to guitars, my pride & joy is a 1991 Rickenbacker 360. This beautiful six-string was a gift from my wife (is she the coolest or what?) after years of pointing them out on stage at concerts or club shows. One day, I’ll share the whole story; today, I want to tell you about a new discovery that has lifted this axe to a whole new level for me.
Rick-o-sound.
For the uninitiated, many Rickenbackers have two output jacks. One is a standard mono output that mixes both pickups and sends them along to your amp, like most other guitars. But the Rick also has a second jack labeled “Rick-o-Sound” that with the right cabling, makes it stereo.
Through the Rick-o-Sound jack, the bridge (which Rick calls “treble”) and neck (“bass”) pickups are wired separately. This means you can run your Rick into two different amps or amp channels and play in stereo.
I’ve never really played with it much. For one, up until about three weeks ago, I only had one amp. For two, I didn’t have the right gear to do it. Essentially, you need a 1/4″ stereo plug to separate to two 1/4″ monos. I tried an “insert” cable (often used for send/return from a mixer to an outboard effect), which works, but limits just how far you can go from your amps. What I really wanted was a Rick-o-Sound kit that used to be available from Rickenbacker. And while they still wire many of their guitars with the Rick-o-Sound plug, they no longer make nor sell the Rick-o-Sound box.
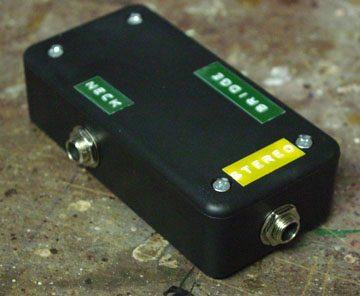
So I did something I’ve never done before — I built one myself. With a few searches, I came up with instructions on the Rickenbacker support forum (click here to see my source; look a few posts down from “Ricknut63). A trip to Radio Shack and $10 later, I had all the makings for my own Rick-o-Sound box.


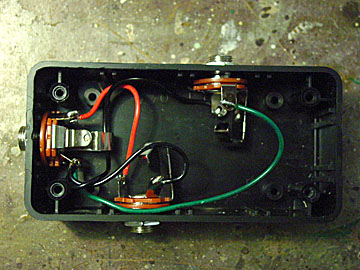
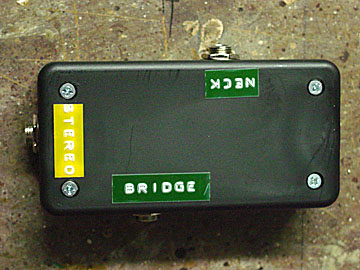
It’s a stereo 1/4″ jack mounted in a project box, then wired to two 1/4″ mono jacks. I followed the instructions, soldered everything together, screwed on the lid and viola, I had my first ever electronics project. (Note: my electronics expertise is with Macintosh computers. I’ve been inside (and fixed) nearly every kind of Mac since the SE. It’s just the soldering thing I could never get down, and I’m ashamed to say I can’t read a schematic)
I then ran a stereo cable from my guitar into the new box, then connected my Vox Cambridge Reverb and my Epiphone Valve Junior to each of the mono outputs. Using the controls on the Rick itself, you can control the tone going to each amp along with the level going to each amp. I sampled the bridge in the Vox and the neck in the Epi, then switched them, then put different effects in each chain, tried moving the amps around…I spent almost two hours trying all kinds of different stereo setups and I’ve only scratched the surface!
If you’re a Rick player and have never gone to the stereo side, it’s time to give it a try. You’ll be glad you did.
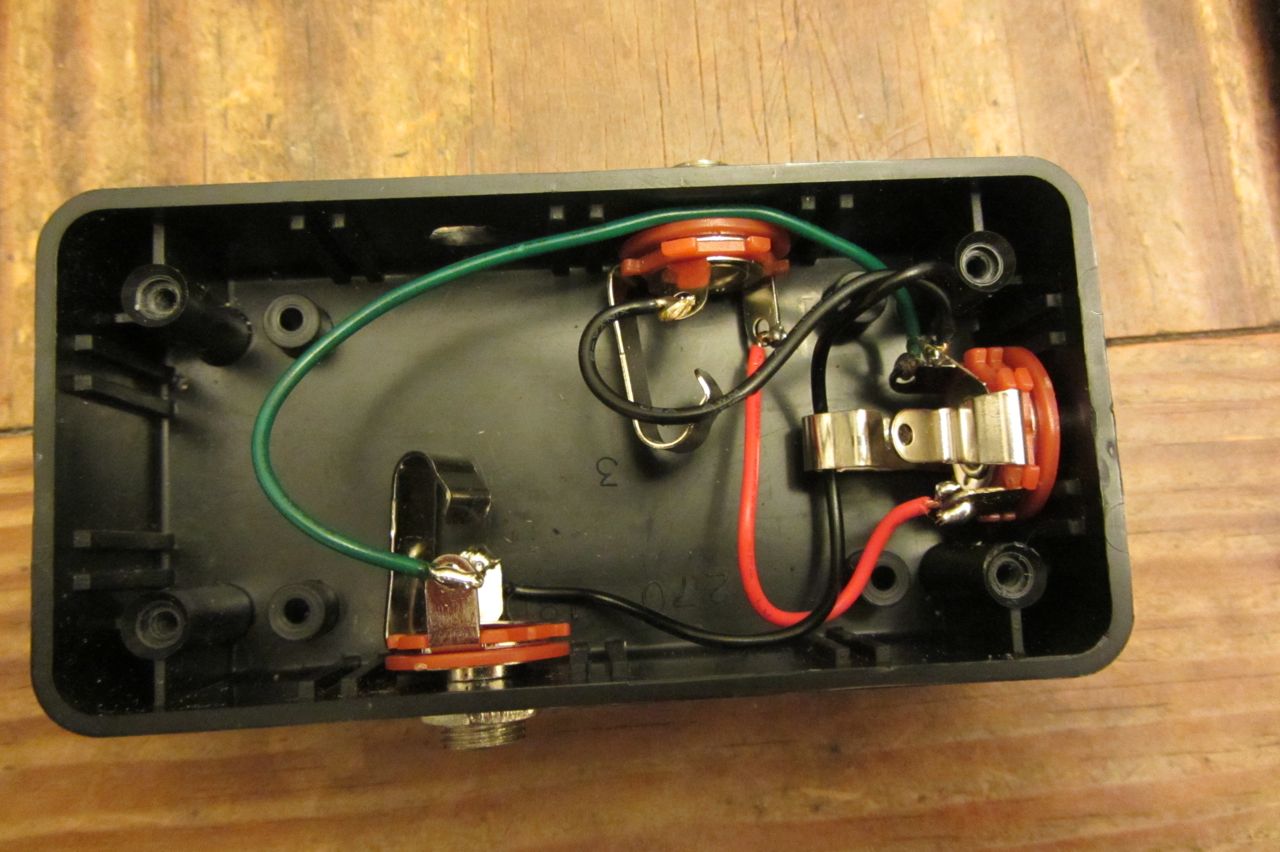
Addendum: Here’s a clearer image of how everything is wired. Unfortunately, the original post this referred to is no longer available.
- The tip of the stereo jack is wired to the tip of the bridge mono jack. (on my jacks, it’s the bottom lug of the stereo to the bottom lug of the bridge mono; it’s the red wire in the image below)
- The “middle” sleeve of the stereo jack is wired to the tip of the neck mono jack. (on my jacks, it’s the middle lug on the stereo jack to the bottom lug of the neck mono; it’s the green wire)
- The sleeves of the mono jacks are both wired to the inner sleeve of the stereo jack (on my jacks, it’s the top lug on both monos to the top lug on the stereo; it’s the two black wires.)

Thanks, and good luck!
Congratulations on making the Rick-O-sound box. I would also like to make one and am an electronics rookie. The link you have to the instructions you followed seems broken…could you send me a copy or the link?
Here’s the link (fixed in the copy, too):
http://www.rickenbacker.com/forum_view_thread.asp?thread_id=3569&forum=General_Forum&thread_name=ric-o-sound%20cable%20discontinued%20now%20what?
Look for a post from “RickNut63,” about a quarter of the way down the page.
Did you ever find the instructions? Looks like the forum moved. Can you send me anything to help me out?
Unfortunately, the forum did move. So here’s how I wired mine, using one stereo and two mono 1/4″ jacks:
— The tip of the stereo jack is wired to the tip of the bridge mono jack. (on my jacks, it’s the bottom lug of the stereo to the bottom lug of the bridge mono)
— The “middle” sleeve of the stereo jack is wired to the tip of the neck mono jack. (on my jacks, it’s the middle lug on the stereo jack to the bottom lug of the neck mono)
— The sleeves of the mono jacks are both wired to the inner sleeve of the stereo jack (on my jacks, it’s the top lug on both monos to the top lug on the stereo.)
I put a new image on the bottom of the post; hopefully, that’ll help.
Thanks, and good luck!
Hi. Like your solution to a y cable in the guitar. Does the project box have to be made from aluminum? Radio shack only seems to carry boxes made from ABS plastic. Thanks.
The one I built is the ABS one from Radio Shack. The plastic works fine; it is very light weight and can move around on the floor a bit, but it seems to be holding together pretty well. Hope that helps — and good luck!
I had a 360/12 in the 1980s. The way to get stereo was to use a standard cable in the standard jack and a stereo cable with the upper collar blanked (no connection) in the Rick-o-sound jack. In this way I could run two cables out of the guitar. No outboard Rick-o-sound device was used. Ran it to two Marshall half stacks. Nothing like it! Sounded great and looked wild – especially with coiled cords.
Sounds neat — but was it stereo? When you blanked the upper collar, did it wire the neck or bridge pickup, or both in mono?
This sounds interesting…I’ll have to give it a try!
I Think as soon as you plug into the mono output on guitar it switches so both jacks would be mono. i.e. the stereo jack has to be connected alone for stereo output. Plug in the standard jack and it combines both pickups, unplug and the pickups are separate.
Well that’s how it is on the bass.
Hello,
Could you lay out the wiring that you had to do? I know this is an old post, and the link you referenced is broken. I bought all the parts and am in the process of making my own and would love to see how you wired it…The 3 prongs on the stereo jack as well as the grounding is what is throwing me off… Thanks so much! Any help would be greatly appreciated
Unfortunately, the forum did move. So here’s how I wired mine, using one stereo and two mono 1/4″ jacks:
— The tip of the stereo jack is wired to the tip of the bridge mono jack. (on my jacks, it’s the bottom lug of the stereo to the bottom lug of the bridge mono)
— The “middle” sleeve of the stereo jack is wired to the tip of the neck mono jack. (on my jacks, it’s the middle lug on the stereo jack to the bottom lug of the neck mono)
— The sleeves of the mono jacks are both wired to the inner sleeve of the stereo jack (on my jacks, it’s the top lug on both monos to the top lug on the stereo.)
I put a new image on the bottom of the post; hopefully, that’ll help.
Thanks, and good luck!
This is perfect, I am going to sand/primer/paint my enclosure and then it’s off to the wiring portion, this is extremely helpful!! Thanks so much for the help
These are great! Pretty cheap too! http://www.rich-e-split.com/
While I haven’t tried one of these, they do look well-built and a good solution for those who aren’t up to building one themselves! Thanks for the link…there’s lots of great info about Rick-o-Sound there.